• Home
  • Food
    • Food
    • Healthy Eating
      • Healthy Recipes
    • Recipes
    • Restaurant Reviews
  • Wine
    • Wine Farms
    • Wine Tasting
    • Wine Reviews
  • Travel
    • Accommodation
    • Cape Town Hotels
    • Child Friendly Travel
    • Hotels
    • International
    • Romantic Getaways
  • Lifestyle
    • Decor
      • Design & Decor
      • Inspiration
    • Fashion
    • Health & Fitness
      • Fitness
      • Healthy Eating
      • Healthy Living
    • Reviews and Features
      • Car Reviews
      • Product Reviews
      • Video Reviews
  • Online Decor Shop
    • Cart
    • Shop
      • Baskets
      • Candles
      • Crockery
      • My account
  • About
  • Contact
    • Advertise or Work With Inspired Living SA
    • Rate Card and Media Kit
  • Photography Portfolio
    • Photography & Styling – Food and Wine

Inspired Living SA

Top South African Lifestyle Blog

You are here: Home / Archives for Beauty

Beauty, Beauty Products, Hair

Garnier Nutrisse Pearly Blondes “Born to be Blonde”

Garnier-Nutrisse Pearly-Blondes

Garnier Nutrisse Pearly Blondes

You may have seen me posting about the new Garnier Nutrisse Pearly Blondes via social media over the past few days. I will be sharing a bit more about my Garnier “Born to be Blonde” experience soon but in the interim I thought I would share a few details about the product with you.

Garnier-Nutrisse Pearly-Blondes

Garnier Nutrisse has just launched blondes so nourished they shimmer!

A well-known fact for all women, is that your hair is the first thing that people look at when they see you. It defines who you are and is a reflection of your personality. If you have great hair, you feel great! The only problem when you are blonde is finding the perfect colour match, especially when you use home colour.

I can testify when you are blonde, it is hard to imagine your hair being anything else! I went really dark once but I simply did not feel like me!

Garnier-Pearly-Blondes

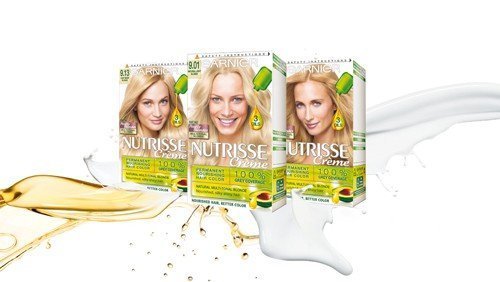
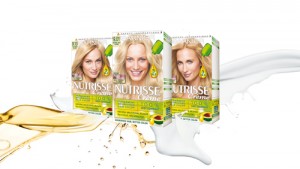
The search for your perfect blonde is over! New Garnier Nutrisse Pearly Blondes in 3 iridescent shades delivers delicate natural looking blondes.

A few interesting “blonde” facts:

  • The word “blonde” is thought to derive from the Old English “beblonden” meaning “dyed.”
  • Blonde hair gets darker with age and pregnancy.
  • Women have been colouring their hair blonde since the time of Ancient Rome.
  • Alfred Hitchcock, the “master of suspense,” was obsessed with blondes and cast only blondes in his movies.
  • Just two percent of the world’s population is naturally blonde.

The new Garnier Nutrisse Pearly blondes deliver golden, iridescent, delicate blondes with shimmering nuances, thanks to it’s illuminating multi-tonal technology. Blondes are not only left with a multidimensional mix of tones but are left with hair which is soft and deeply nourished.

Garnier-Pearly-Blondes-Ingredients

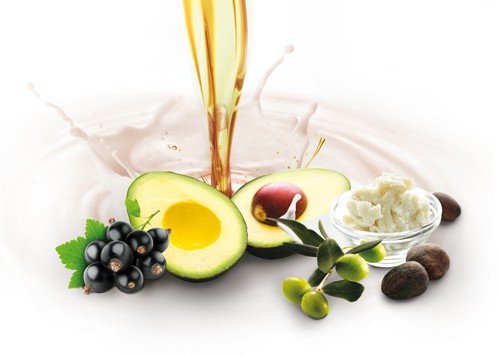
The Ultra Nourishing Formula is enriched with 3 Oils (Avocado, Olive, Blackcurrant and Shea Butter). Your hair is left feeling silky and looking shiny. This combination of ingredients also helps protect your hair against dryness for up to 8 weeks.

The Garnier Nutrisse Pearly Blondes ensure perfectly blended 100% grey coverage, for a long-lasting delicate pearly blonde with an incredible shine.

Nutrisse’s rich, non-drip colour crème is so easy to work through your hair. Just remember to read the packaging insert carefully and do the 48 hour allergy test before using the product.

Garnier Nutrisse Pearly blondes are available in all clicks stores and will be available in Dischem from the 1 February. RRP R99.95. For more information on the Garnier Nutrisse Pearly Blondes visit their Facebook page.

Check back soon for details about my #BorntobeBlonde adventure in Johannesburg!

Disclosure Ranking:2

  • LinkedIn 0
  • Twitter
  • Facebook 0
  • Pinterest 0
  • StumbleUpon 0

Beauty, Beauty Products

Manicure Basics {Mani Monday}

Manicure-Basics Mani Monday Inspired Living SA

Manicure Basics

I thought I would start my Mani Monday series with a few Manicure Basics. As I said before, as busy women time is often limited and the only option is a DIY home manicure! To do this properly you need the correct tools and products!

Manicure Basics Mani Monday Inspired Living SA

Below you will find the tools and products, which I consider to be Manicure Basic Essentials, most of them inexpensive drugstore products, as well as a few tips on how to keep your nails looking awesome! I will also include a video I did last year featuring DIY manicure and pedicure essentials.

Scrub ~ As part of my weekly nail and hand maintenance I use a scrub. You can use one specifically for hands but I tend to use whatever body scrub I am using and do it as part of my shower routine. Scrubbing essentially gets rid of any dry skin and leaves your hands lovely and smooth! If you prefer not to do this in the shower, then soak your hands in warm water before you scrubbing them. Rinse and towel dry before you begin the rest of your manicure. {I am often too rushed, which is why I do it in the shower.}

Manicure Basics Filing-and-shaping nails

Filing and Shaping ~ As with most things in life, nail shape is very much personal preference. I was advised many years ago not to cut my nails but to only file them. The reason I was given is that cutting them affects the nail integrity and tends to weaken your nails. Whether this is based on fact I am not too sure but I have very strong nails so maybe the is some sense in this! At this point you could use nail clippers or nail scissors, if you cut your nails or alternatively use an emery board to shape them. I prefer my nails to be more of a squared oval shape{squoval} and I like them quite short but as I said the shape is up to you! File your nails from the sides towards the center and not back and forth across your nail.

Manicure Basics Nail Shapes

Filing-and-buffing

Buffing ~ Once you have gotten the shape you like, tidy the ends and lightly buff your nails, to get rid of any old polish residue and or ridges. Do not over buff because this can weaken your nails. There are quite a few different products on the market for smoothing and buffing nails but I prefer the block style one above, which is from Clicks. At this point wash your hands to get rid of any filing dust.

Manicure basics Pushing-Back-Cuticles

Cuticles ~ I like to spend a bit of time on my cuticles because lets face it nice cuticles make nice nails! Think of cuticle maintenance as three-step procedure. 1st Push-back your cuticles using a cuticle pusher{you can apply a cuticle remover or softener first but with regular maintenance your cuticles should remain soft and pliable} I like to use a cuticle pusher with a soft end, as it is more gentle on your nails and cuticles. 2nd Very carefully trim any loose pieces of skin from your cuticles, using a cuticle nipper, being very careful not to nick yourself.

Manicure Basics Cuticle-Oil

3rd Rub either cuticle oil or cream into your cuticles to sooth them. Follow these steps once a week to ensure lovely soft cuticles!

Cuticle-Cream3Manicure Basics Nail-Polish-Remover

*HOT TIP* Clean Nails ~ Once you have finished pampering your nails, use nail polish remover on a cotton round, to remove any oily residue before applying a base coat. You could simply skip this step, if you are leaving your nails bare and simply apply a good quality hand cream.

Base Coat

Base Coat ~ The main reason I use a base coat, is to help protect may nails, it prevents dark colours from staining your nails and helps my nail polish last that much longer. It also gives polish an even surface to adhere to. There are so many base coats available and you can feel a bit like a dear caught in the head-lights trying to pick one. The best way to choose, is to assess if you have any major issues with your nails. Ask yourself a few questions: are your nails brittle and always breaking – then using something strengthening would be advised, do your nails tend to yellow from applying polish – then use an anti-yellowing base coat or do you have ridges – then use a ridge filling product.

Nail-Polish-and-top-coat2

Nail Polish ~ Once you have completed all of the above you can either leave your nails looking natural or apply your favourite polish and a top coat. I will touch a bit more on polish application in a future post.

Woolworths Hand Cream

Hand Cream ~ Last but certainly not least apply a good quality hand cream. I like to reply hand cream a few times during the day and find it helpful to keep one in my hand bag. If you are driving or spending time in the sun, then it is advisable to use a sunblock on your hands as well.

DIY-Manicure-Basics2


{Please excuse how yellow my nails are looking at the moment! They have actually improved quite a bit after being in nail polish detox, for the past two weeks. They were extremely yellow, after constantly wearing very bright nail polish over the festive season!}

[youtube]http://youtu.be/lcB_eSKxiIg?list=UUCqHeDu6WN0l8K_iiR-1sog[/youtube]

I would love to hear about any of your favourite manicure products or if you have any handy tips to add – please leave a comment below.

Image source: Nail Shapes Visual Guide

Disclosure Ranking:1

  • LinkedIn 0
  • Twitter
  • Facebook 0
  • Pinterest 0
  • StumbleUpon 0

Beauty, Beauty Favourites

Mani Monday

Mani-Monday Inspired Living SA

Mani Monday

I love having my nails done but often don’t find the time to get to the salon, with the result I mostly do my own nails. DIY manicures and pedicures have kind of become my thing! As much as I love pretty painted nails, I also feel it is very important to take care of your hands and feet! It is vital to keep them looking good, regardless of whether your nails are painted or not!

Mani-Monday Inspired Living SA

It is important to have a regular routine to take care of your nails. I probably pay a bit more attention to my fingernails and hands, than I do to my feet. This is largely because my hands are more visible and tend to have more sun exposure, especially when I am driving.

Mani Monday Rubybox Nailed It Laquers

People are always asking me what products I use and how I get my manicure to last so long, so I thought it would be a great idea to share a weekly Mani Monday post. It will feature tips on how to care for your hands and nails, as well as nail polish colour trends and the occasional bit of nail art.

Please let me know if you have any particular questions, which you would like me to answer in these posts or if you have any great tips or products to share – leave a comment below. So check back each week for our Mani Monday posts!

Products: Essie, Rubybox Nailed It Lacquer, Sally Hansen

Disclosure Ranking:1

  • LinkedIn 0
  • Twitter
  • Facebook 0
  • Pinterest 0
  • StumbleUpon 0

Beauty, Beauty Products

Nail Polish Top 10 Colours for 2014

Sorbet Hotshot Dec 2014

Top 10 Nail Polish Colours for 2014

Happy New Year! I hope you all had a great festive season and are having a fabulous holiday if you are away! I am back after a bit of a break and rather busy Christmas and New Year.

Happy New Year 2015 Inspired Living SA

While sifting through all my Instagram pics for 2014, I realised I have taken lots of pics of my favourite Nail Polish Colours! I thought it would be a fun to share these with you. There were quite a few colours which featured more than once and my favourite, Coral shades, featured often!

These are My Top 10 Nail Polish Colours for 2014 via Instagram. Featured from most recent to January 2014:

Nail Polish Colours Sorbet Hotshot Dec 2014

 Sorbet Hot Shot

Rimmel Salon Pro Cocktail Passion 2014

 Rimmel Salon Pro “Cocktail Passion”

Nail Polish Colours Catrice Ultimate Nudes 2014

 Catrice “Ultimate Nudes”

Nails Inc Basil Street 2014

 Nails Inc. “Basil Street” {My favourite nude shade for 2014!}

Essie Really Red 2014

 Essie “Really Red” {Definitely my favourite red Nail Polish for 2014}

Essie Over the Top 2014

 Essie “Over the Top”

Essie Mint Candy Apple 2014

 Essie “Mint Candy Apple”

Essie Carry On 2014

 Essie “Carry On” {Definitely my favourite winter Nail Polish Colour}

Tip Top Coral Candy 2014

 Tip Top “Coral Candy”

Mavala Lame Gold and Catrice Two Million Dollar Baby 2014

Catrice “Two Million Dollar Baby” {Worn over Mavala Lame Gold – definitely my favourite glittery Nail Polish Colour}

It was quite difficult to only pic 10 of my Top Nail Polish Colours but these are the shades I used the most during 2014! Which is your favourite shade from the top 10 and do you have any favourites from 2014?

  • LinkedIn 0
  • Twitter
  • Facebook 0
  • Pinterest 2
  • StumbleUpon 0

Beauty, Beauty Products

Rubybox Nailed It Lacquer Summer Shades

Rubybox-Nailed-It-Lacquers

Nailed It Lacquers

As you well know I am a bit of a nail polish junkie but lately I have been wearing the same old colours – boring I know! Well imagine my excitement when a pretty little package from Rubybox arrived at my door and woohoo it contained three of their recently launched, Nailed It Lacquer Summer Shades!

Rubybox-Nailed-It-Lacquer Sunset Horizon

The rubybox Beauty Nailed It Lacquer collection is the perfect addition to the rubybox offering. Each season Rubybox will release up to ten new shades, starting with their Summer Collection, featuring sexy brights and pretty pastels.

Rubybox-Nailed-It-Lacquer

I am always a bit skeptical when trying out new nail polish as I have a few go-to brands, which I use religiously! Well I was not disappointed with the Nailed It! Lacquers; they paint very well and I have found the staying power really good. I also found that you could actually get away with one coat, {plus a clear top coat} if you are in a rush, which I usually am!

The brief from Rubybox was to create fun nail art looks for summer using the Sunset Horizon collection which they sent me. The three shades in my Nailed It Lacquer collection are: Sweet as Candy, Just Peachy and Monday Blues, perfect summery shades! The collection is currently on sale on the Rubybox website for R149.95, reduced from R224, which I think is an absolute bargain for three shades!

Let me please just point out that I am not a nail artist, so although these designs may not perfect but I had so much fun creating them!

Rubybox-Nailed-It-Lacquer

Rubybox-Nailed-It-Lacquer

I used Miss Jen Fab for a bit of inspiration when creating this first look which was definitely the easiest of the three.

Rubybox-Nailed-It-Lacquers

The next look was also quite easy to create, using different coloured dots to create a fun summery pattern.

Rubybox-Nailed-It-Lacquer Beach Nail Art

This was probably my favourite to create! A beach inspired look – if you look closely you will see a bikini, beach ball, ice cream and a flip-flop 🙂

Rubybox-Nailed-It-Lacquer

As I said I had lots of fun creating these three Summer Inspired nail art looks with the Rubybox Nailed It Lacquer Collection. Which look is your favourite? Please let me know in the comment section below.

To find out more about the Nailed It Lacquers or order online, check out the Rubybox website.

Disclosure Ranking: 2

  • LinkedIn 0
  • Twitter
  • Facebook 0
  • Pinterest 0
  • StumbleUpon 0
  • « Previous Page
  • 1
  • …
  • 8
  • 9
  • 10
  • 11
  • 12
  • …
  • 39
  • Next Page »

Meet Fiona Rossiter

Hi, I am Fiona Rossiter, from Cape Town, the writer and photographer behind Inspired Living SA Blog. If you love good Food and Wine, reading amazing Travel Adventures, keeping Fit and Healthy, as well following Decor Trends – then Inspired Living SA is just the place for you! Read More…

  • Email
  • Facebook
  • Instagram
  • Pinterest
  • Twitter
  • YouTube

Subscribe to stay connected

Subscribe on YouTube

Wine News & Reviews

Delicious Recipes

Travel Reviews

In The Media

Inspired Living SA In the Media
© Copyright 2015 Inspired Living SA ·